Documentation of final projects
Notebook
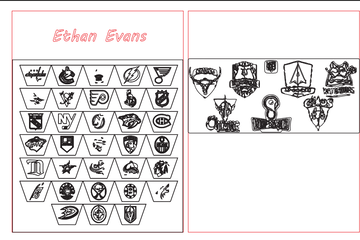
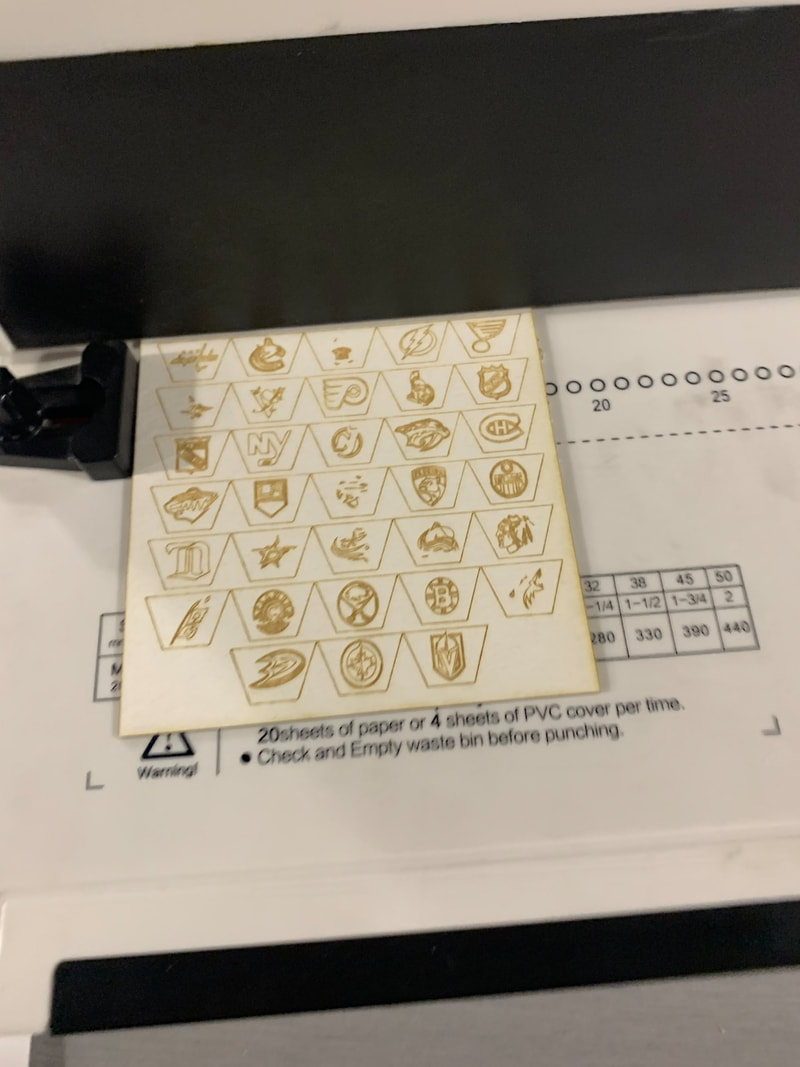
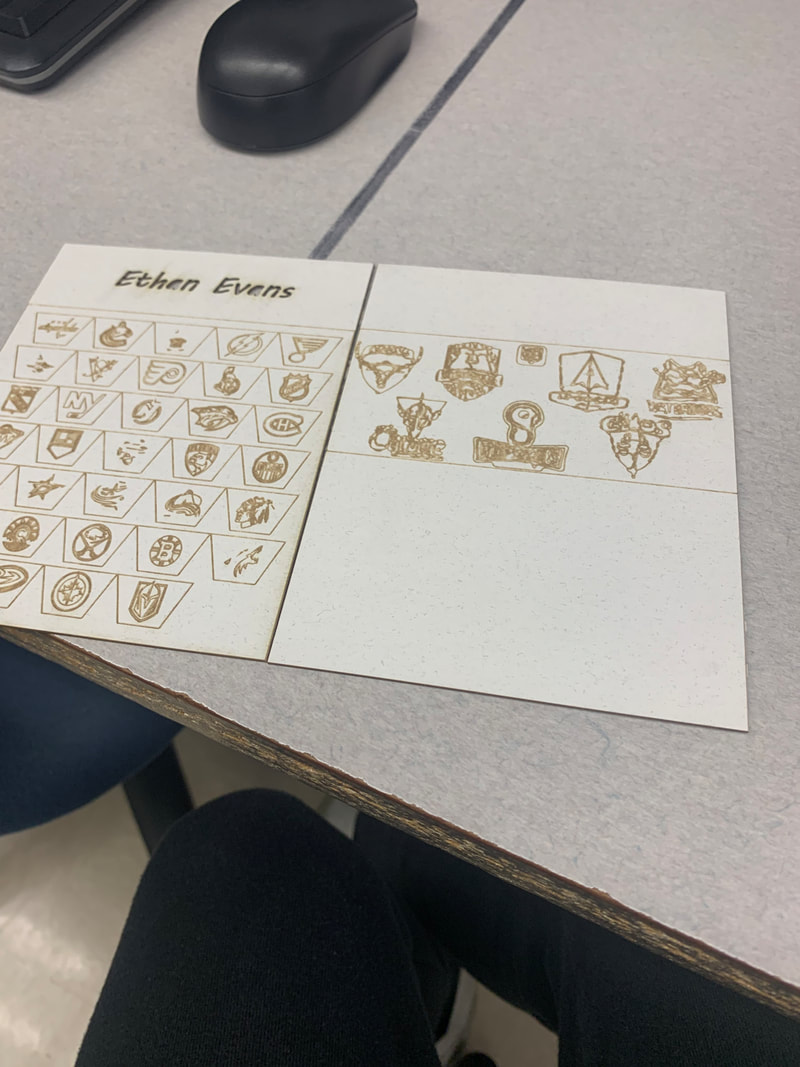
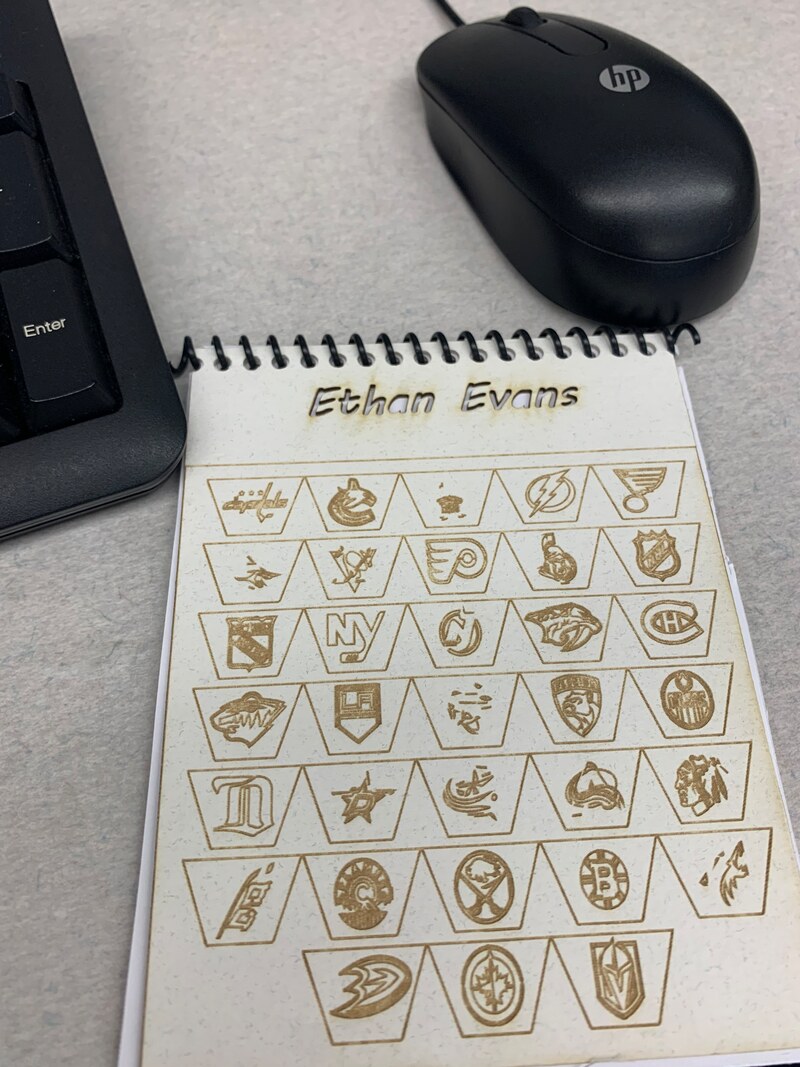
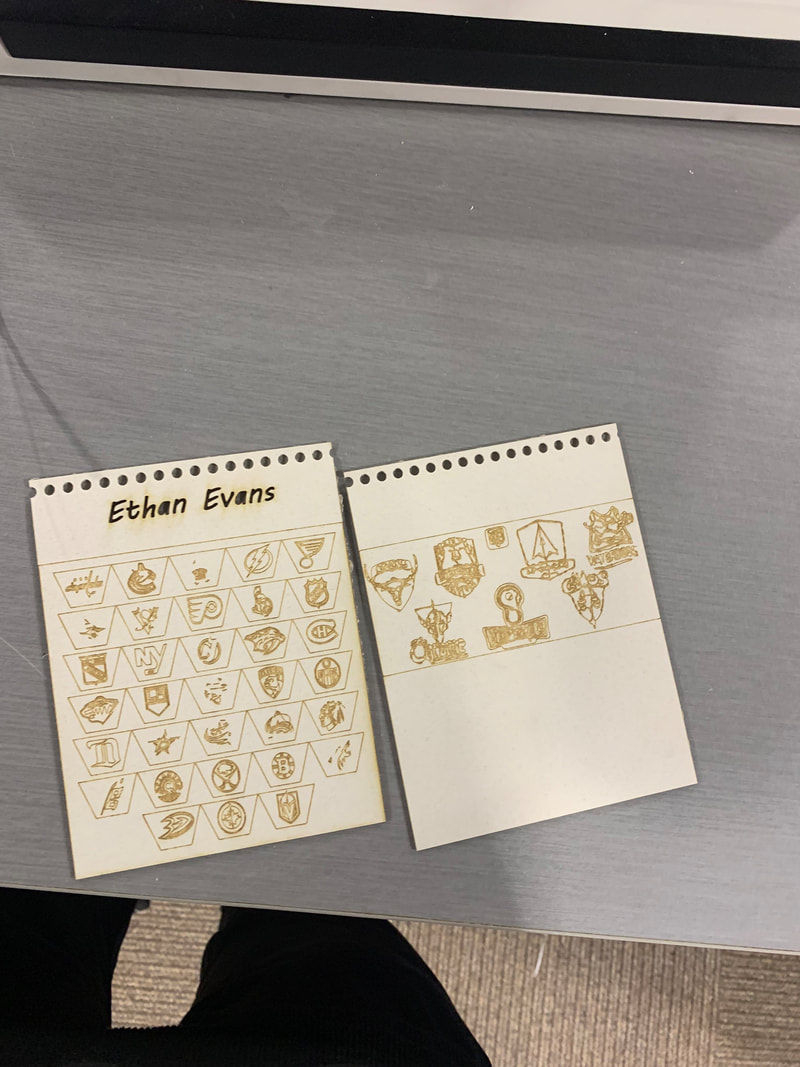
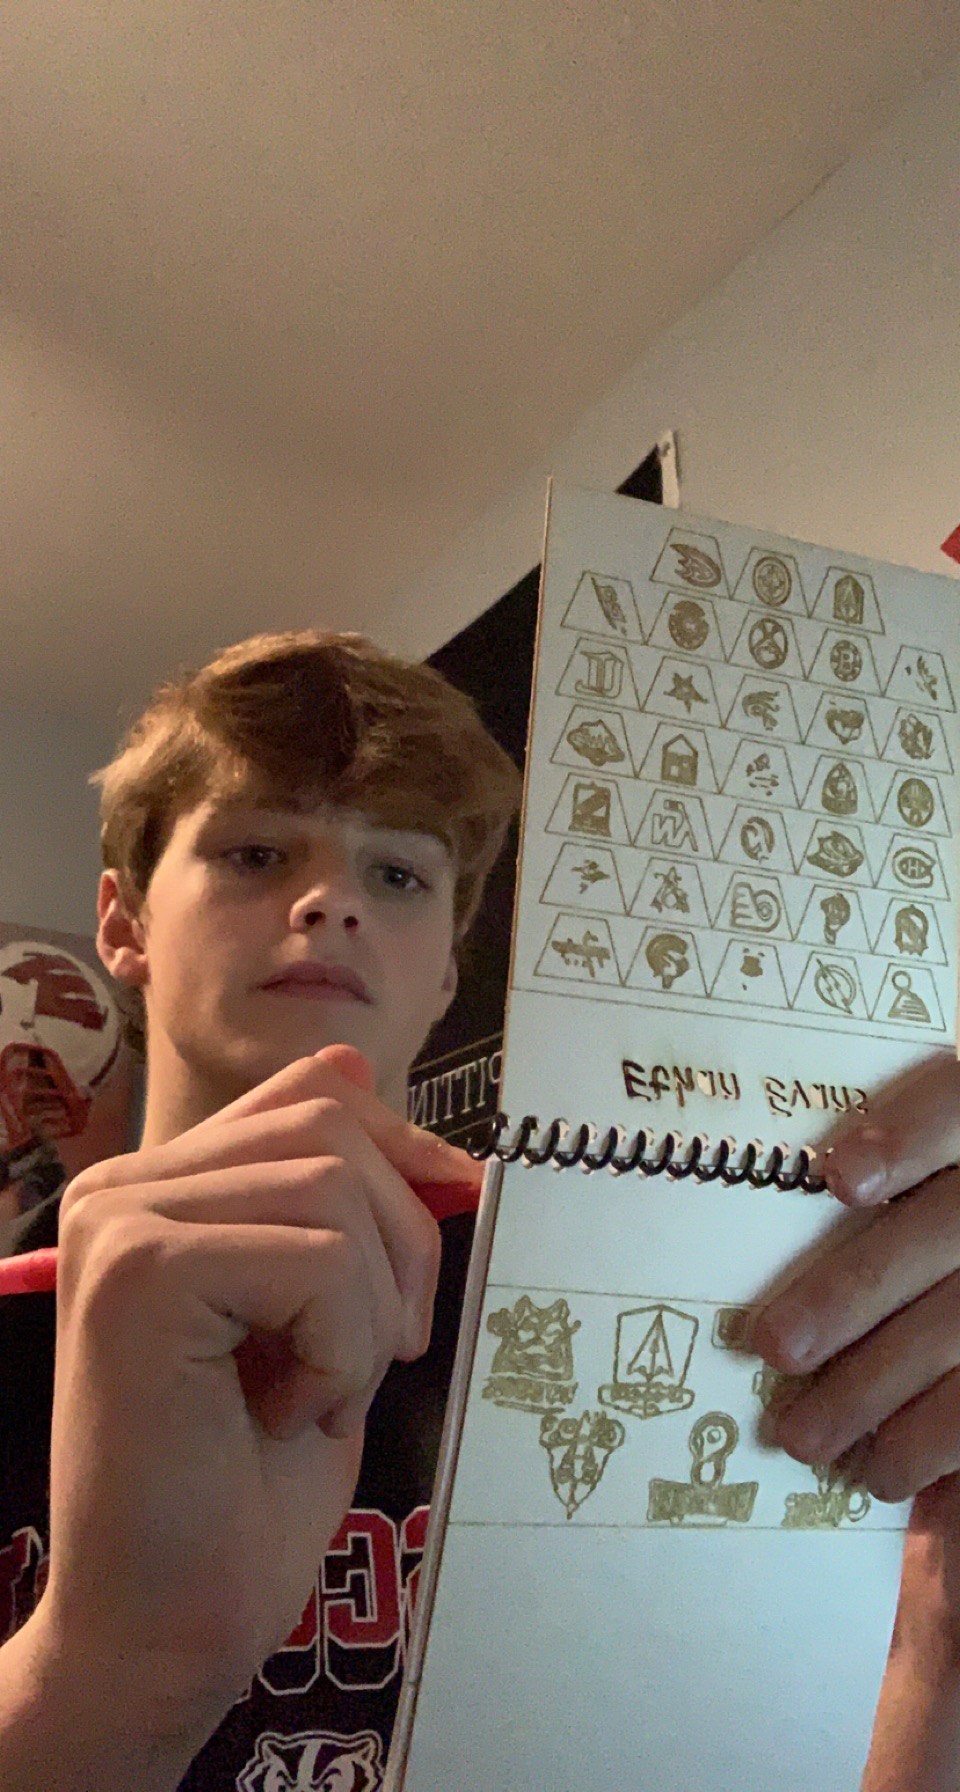
When I was thinking about what to use for my notebook cover I immediate thought of what I like to do in my free time. This made me realized that choosing a hockey or lacrosse design. Then I thought why not both! This lead me to deciding that I would use a picture of all the NHL hockey teams on the front with my name cut out, and having all the PLL teams on the back cover. I then quickly went onto adobe illustrator, and google to find the images I was looking for. Once I found my images I put it onto illustrator and was ready to cut out my notebook cover. I then cut out my notebook cover and immediate got to putting it together. Once I finished putting together all the materials I had my own original notebook.
Water Bottle
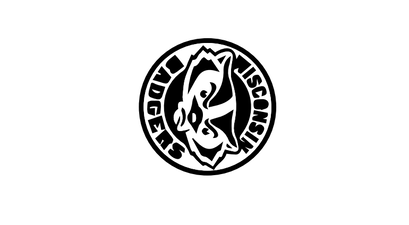
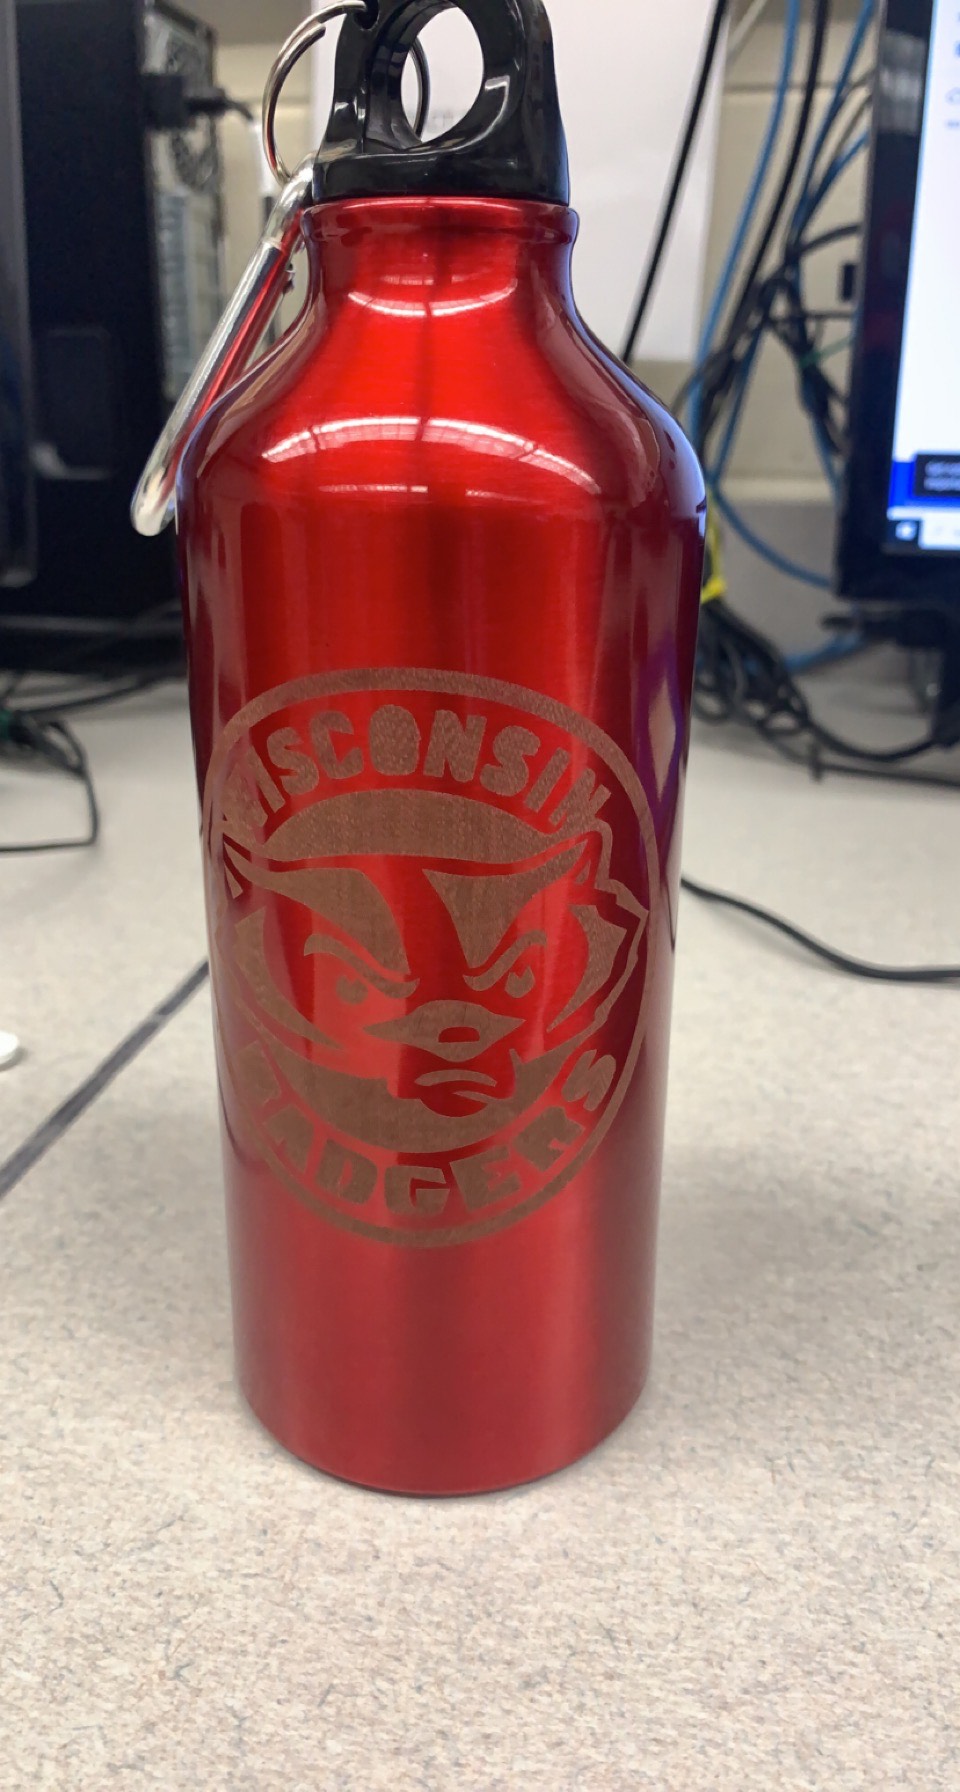
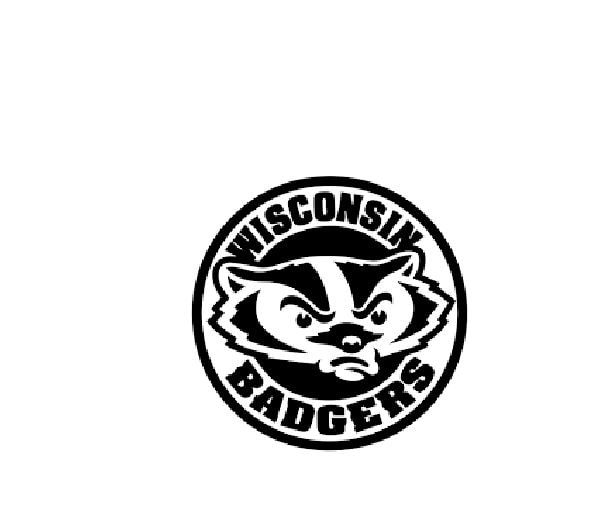
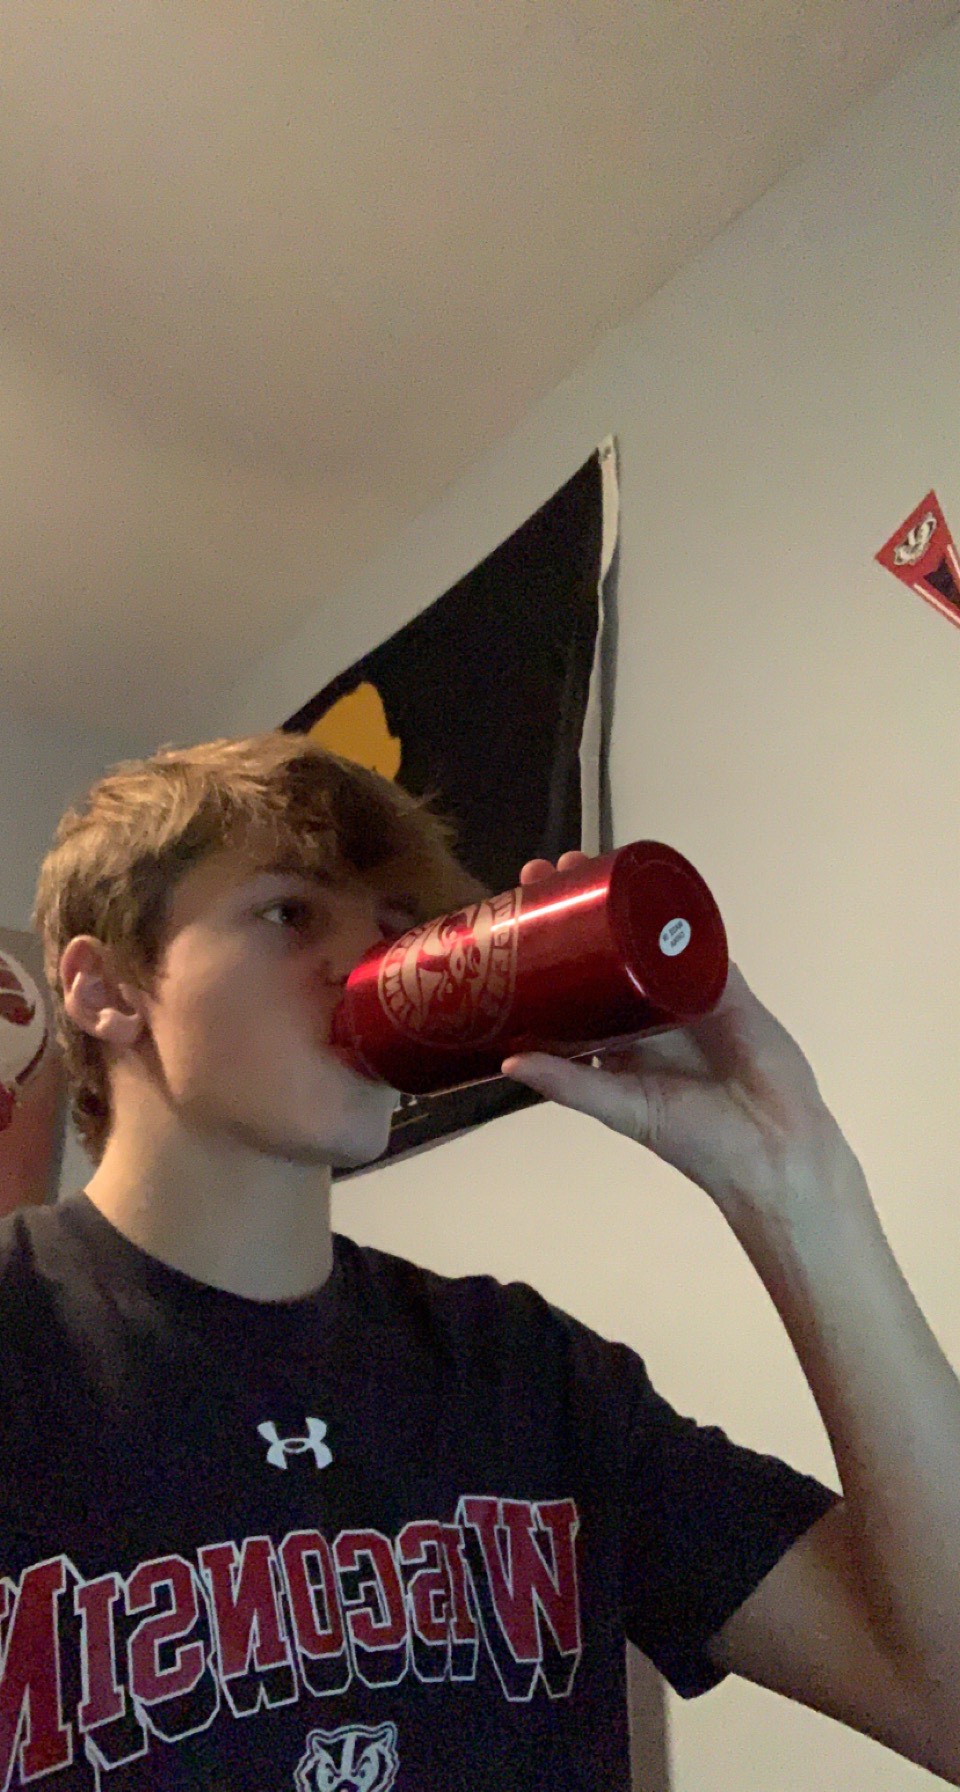
When I was thinking about what design I wanted my water bottle to have I was clueless. So I decided what color I would use first. I then decided that red would be the best for me. Once I thought or red I thought of the Wisconsin badgers and decided that would be my design for my water bottle. Quickly I opened up adobe Illustrator and found the best image the met my needs. I then altered the image so that I could laser engrave the design on the water bottle and saved it on my USB. I then went to the innovation center and engraved the image onto my new water bottle.
Cardboard 3D
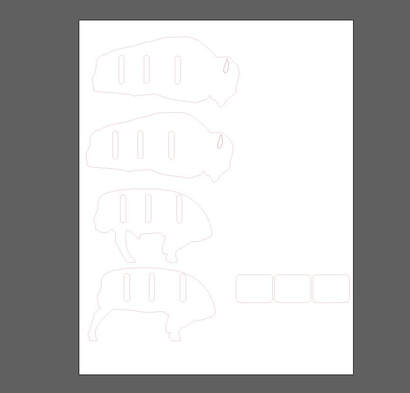
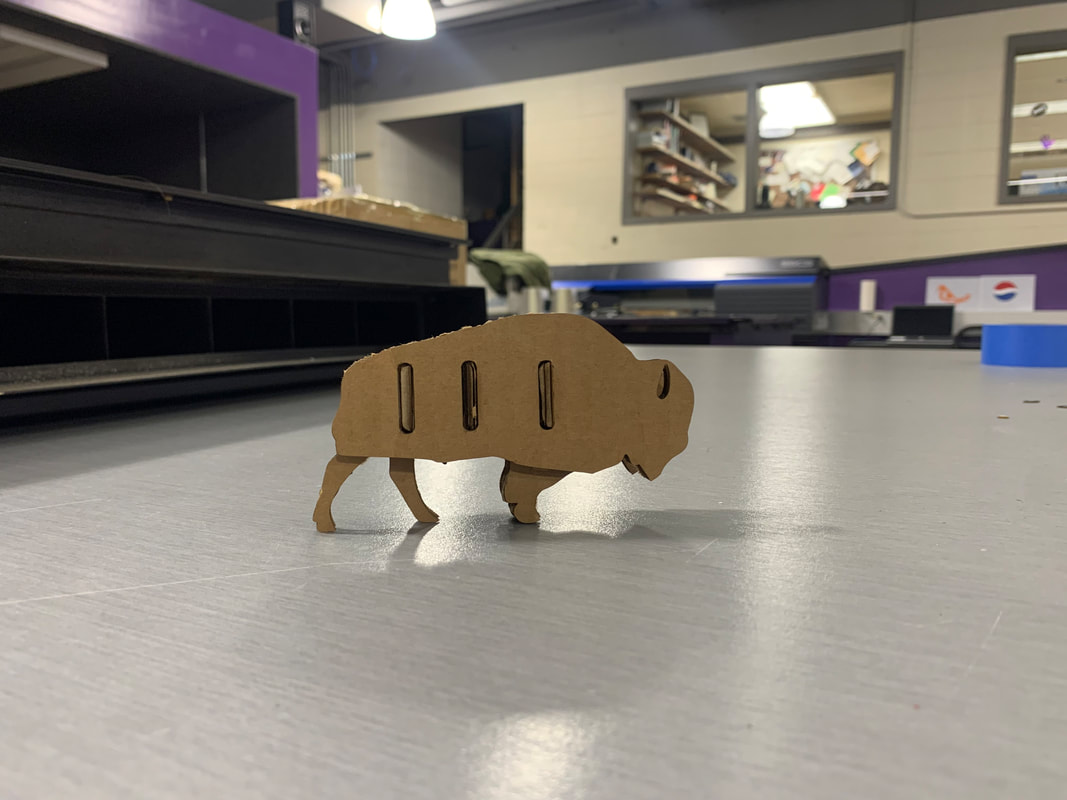
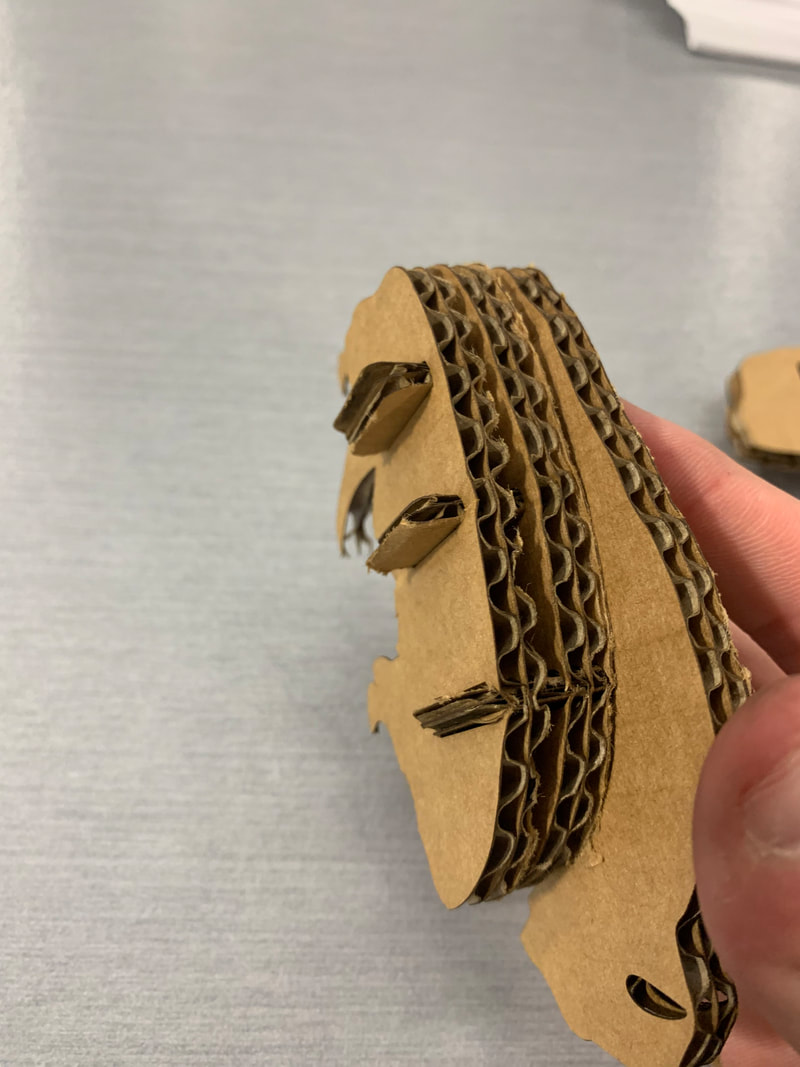
I was looking on thingverse and saw a 3D cardboard cutout and thought that it would be a great idea to do that for my 3D project. So I saved the adobe illustrator file, and then changed it so I could print it on the laser. Once I did that I saved the file on my USB and entered the innovation center. I then grabbed my piece of cardboard did all the needed measurements and then cut out the design. Once I had all the cut outs I put them together to create my 3D cardboard bison.
When I was thinking about what to use for my notebook cover I immediate thought of what I like to do in my free time. This made me realized that choosing a hockey or lacrosse design. Then I thought why not both! This lead me to deciding that I would use a picture of all the NHL hockey teams on the front with my name cut out, and having all the PLL teams on the back cover. I then quickly went onto adobe illustrator, and google to find the images I was looking for. Once I found my images I put it onto illustrator and was ready to cut out my notebook cover. I then cut out my notebook cover and immediate got to putting it together. Once I finished putting together all the materials I had my own original notebook.
Water Bottle
When I was thinking about what design I wanted my water bottle to have I was clueless. So I decided what color I would use first. I then decided that red would be the best for me. Once I thought or red I thought of the Wisconsin badgers and decided that would be my design for my water bottle. Quickly I opened up adobe Illustrator and found the best image the met my needs. I then altered the image so that I could laser engrave the design on the water bottle and saved it on my USB. I then went to the innovation center and engraved the image onto my new water bottle.
Cardboard 3D
I was looking on thingverse and saw a 3D cardboard cutout and thought that it would be a great idea to do that for my 3D project. So I saved the adobe illustrator file, and then changed it so I could print it on the laser. Once I did that I saved the file on my USB and entered the innovation center. I then grabbed my piece of cardboard did all the needed measurements and then cut out the design. Once I had all the cut outs I put them together to create my 3D cardboard bison.
Recipe to make projects
How to make the notebook
step 1: Open adobe illustrator
Step 2: create new and create dimension 6*9 inches
Step 3: Create two Identical rectangles that both have dimensions of 4.25*5.5 inches.
Step 4: Make the rectangles red and have an outline of .0001
Step 5: Enter in the images for the front and back of the notebook
Step 6: Create outlines for images
Step 7: Enter in text box and put in name
Step 8: Change text to red so it cuts out and .0001
Step 9: Create outlines for name
Step 10: Save to USB
Step 11: Grab piece of notebook material
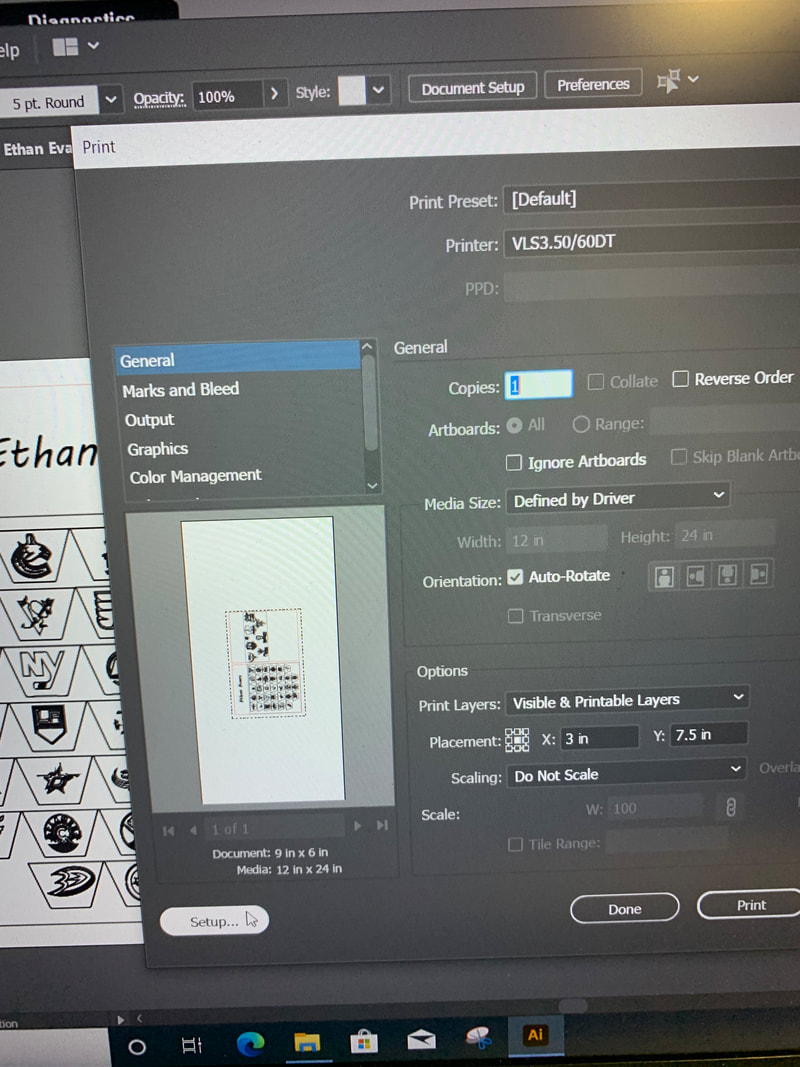
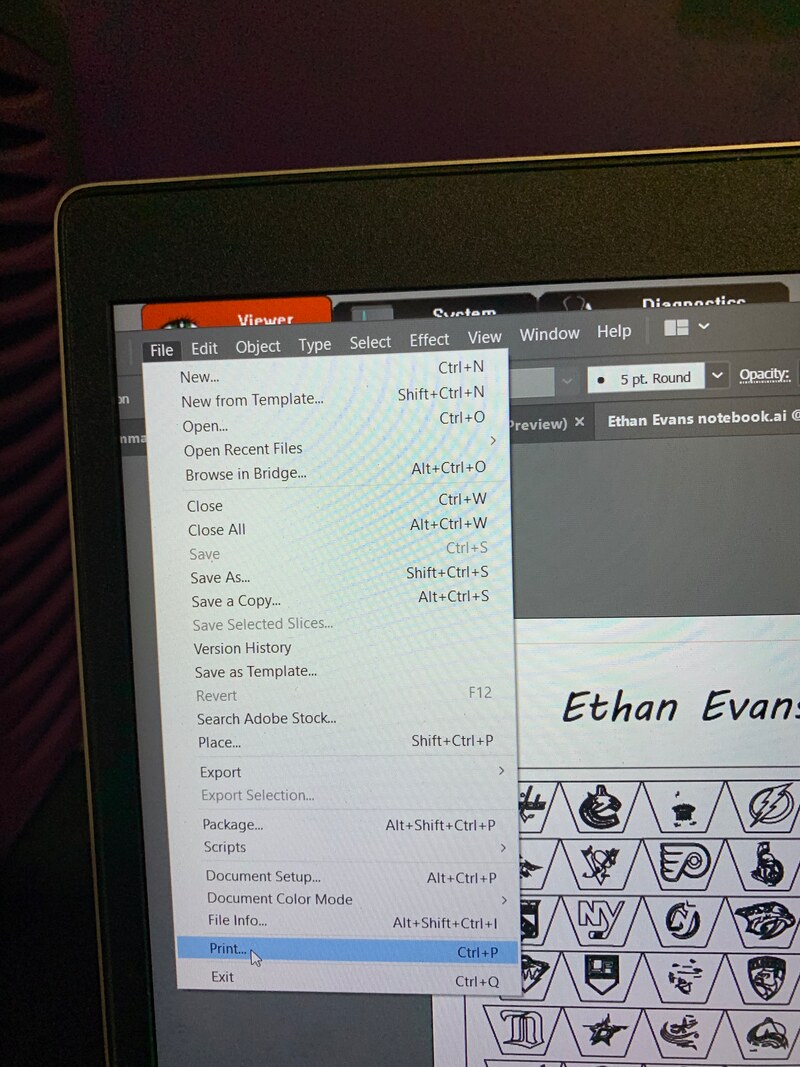
Step 12: Insert usb in computer and click file
Step 13: Click file then print
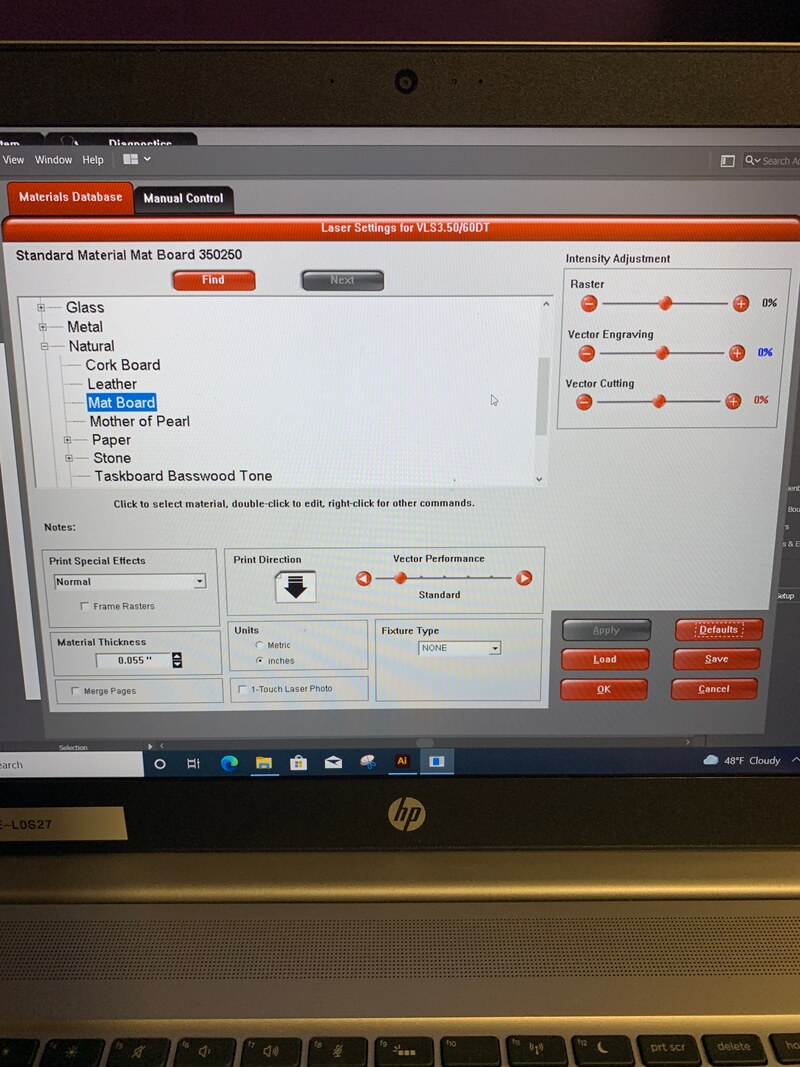
Step 14: click setup and then preferences
Step 15: on the materials click natural and then mat board
Step 16: click apply
Step 17: Click ok
Step 18: Click print
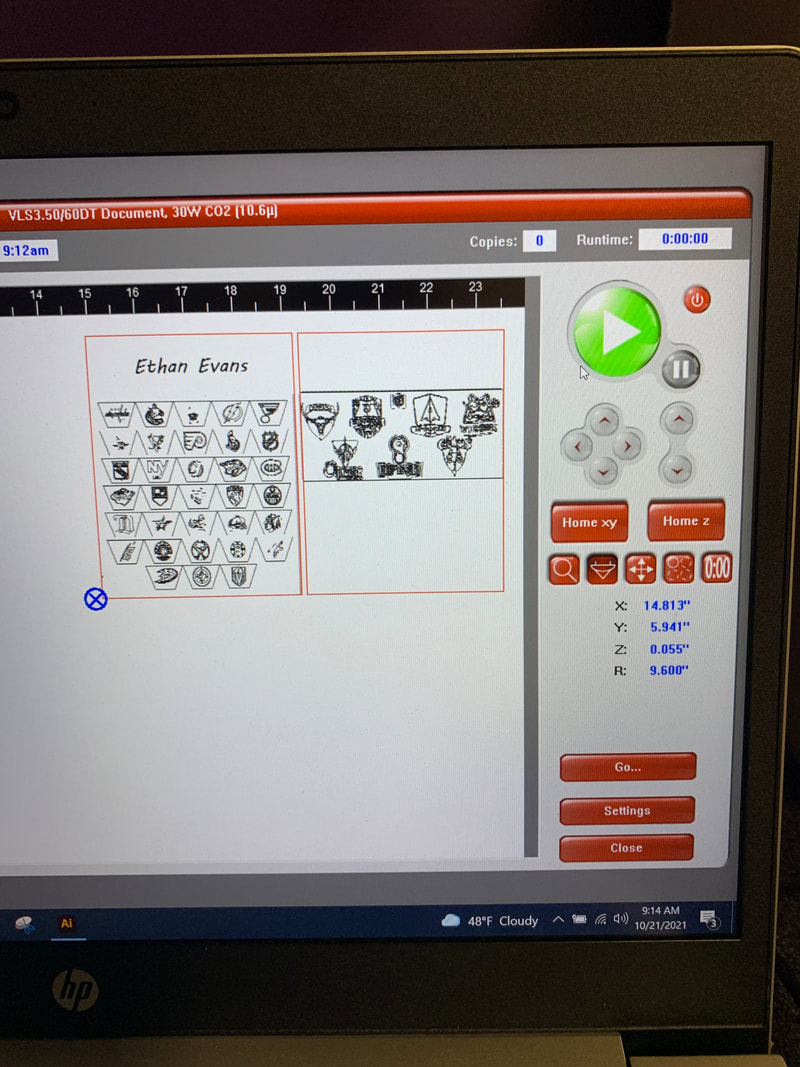
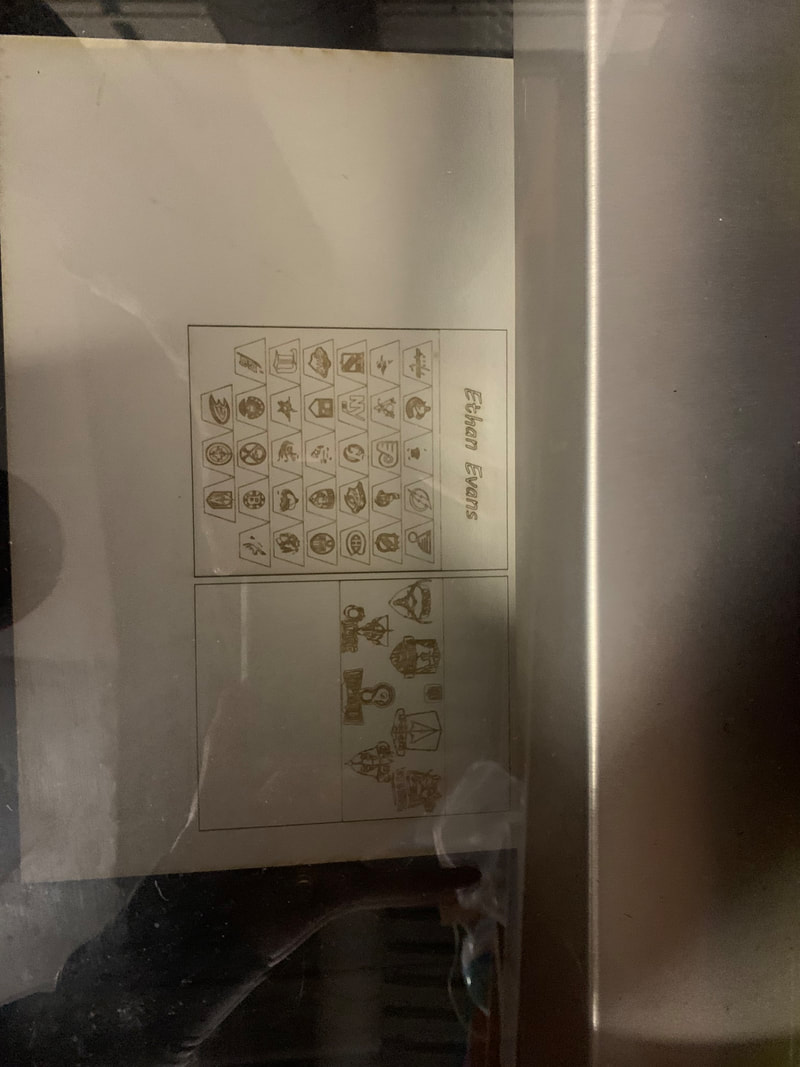
Step 19: Move notebook design into desired spot using the tool with the arrows logo
Step 20: Locate the 4 corners with the focus tool that looks like an upside down triangle
Step 21: Put mat board on laser bed
Step 22: Close the laser top
Step 23: Click on the green play button
Step 24: once the process is finished take the notebook cover out
Step 25: Then cut out the holes of the notebook cover along with the paper cut out that is the same size as the notebook cover
Step 26: line up the holes and use the twirly piece of plastic to twirl around the holes and combine the holes together
Step 27: Now you have a Notebook
Step 25: Then cut out the holes of the notebook cover along with the paper cut out that is the same size as the notebook cover
Step 26: line up the holes and use the twirly piece of plastic to twirl around the holes and combine the holes together
Step 27: Now you have a Notebook
Creating the Water Bottle
Step 1: Open adobe illustrator
Step 2: create a new document that is 10*10 inches
Step 3: Inset the image that you want
Step 4: Right click
Step 5: click on Group
Step 6: Right click again and then click transform
Step 7: Rotate 270 degrees
Step 8: Click OK
Step 9: Save on USB
Step 10: Grab water bottle and place it in the jig
Step 11: Move up the red lever and slid the jig till the water bottle is snugly on the jig
Step 12: Move the lever back down
Step 13: make sure the water bottle placement looks like the photo
Step 14: close the laser lid
Step 15: Enter the USB into the laptop
Step 16: Click on the water bottle file
Step 17: Click file then print
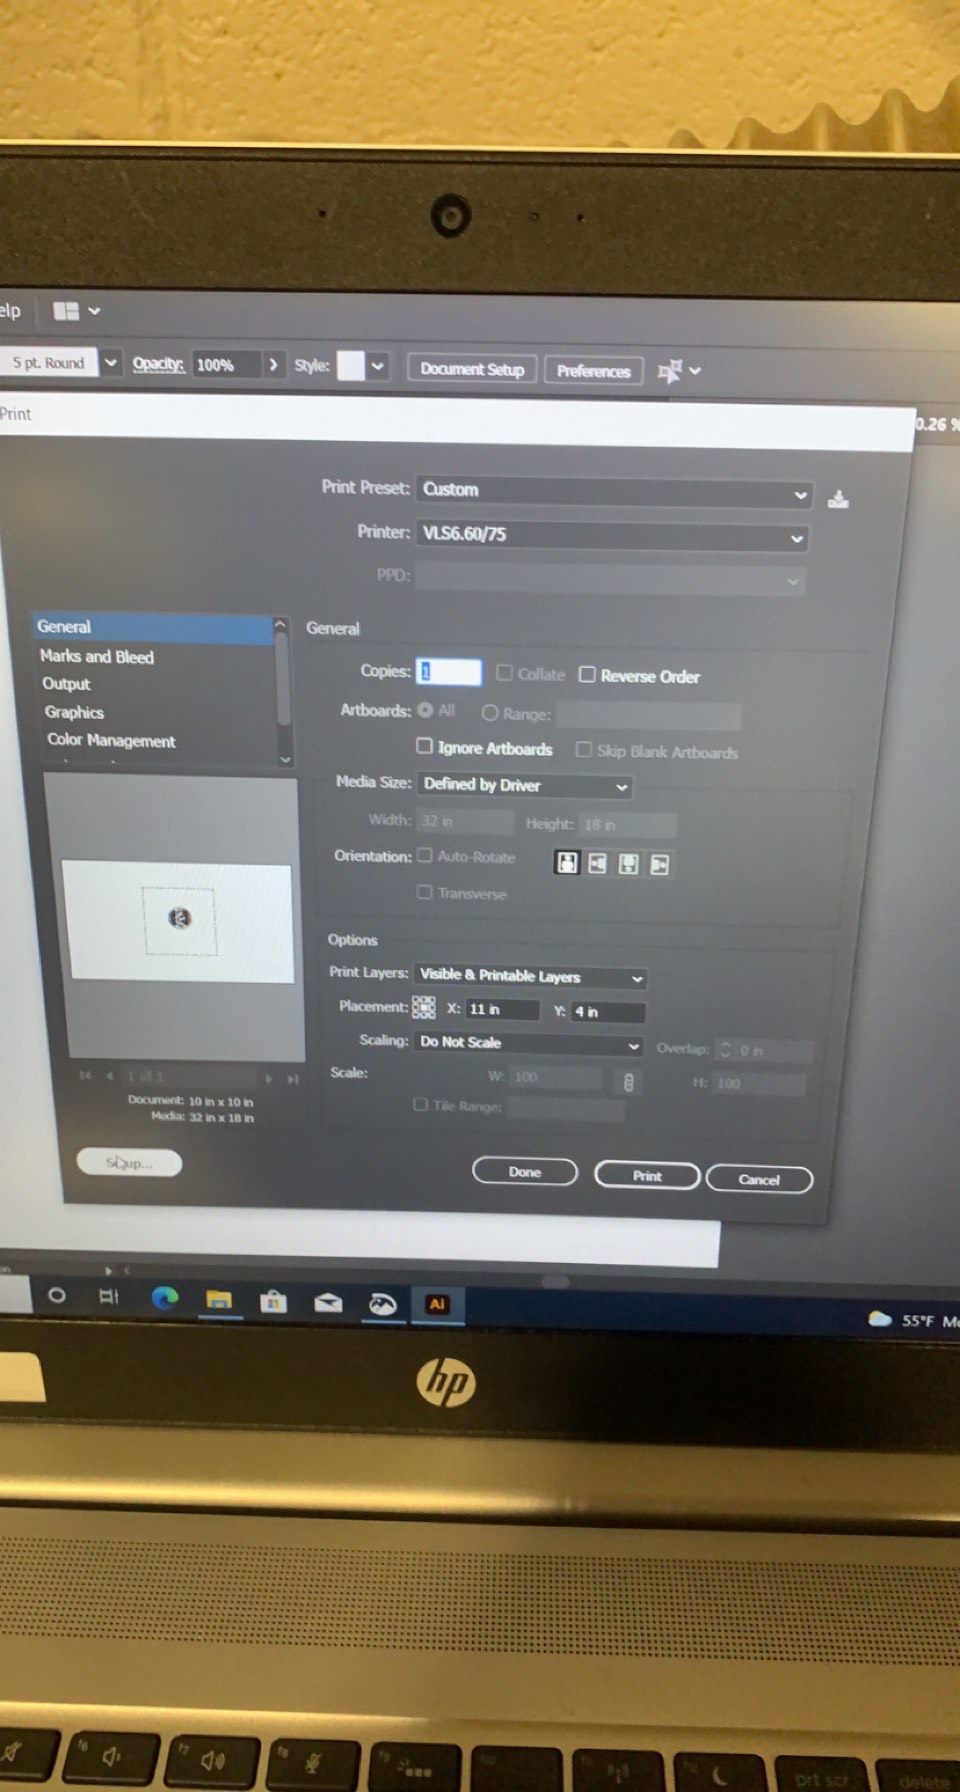
Step 18: Click setup then preferences
Step 19: Change the power of the laser to 70% and the speed to 40%
Step 20: Click apply and OK
Step 21: Go to the materials and click Metal, aluminum, Anodized.
Step 22: Click rotary and change the diameter to 2.875 inches
Step 23: Click apply then OK then print print
Step 24: go to the UCP and use the relocation tool to move the design to the desired place
Step 25: use the focus tool to put where your design starts and stops on the water bottle
Step 26: if all of that is good the close the top of the laser and turn on the fans
Step 27: Click on the green play button
Step 28: Once the process is finished take out your water bottle
Step 29: You now have a new water bottle
Step 15: Enter the USB into the laptop
Step 16: Click on the water bottle file
Step 17: Click file then print
Step 18: Click setup then preferences
Step 19: Change the power of the laser to 70% and the speed to 40%
Step 20: Click apply and OK
Step 21: Go to the materials and click Metal, aluminum, Anodized.
Step 22: Click rotary and change the diameter to 2.875 inches
Step 23: Click apply then OK then print print
Step 24: go to the UCP and use the relocation tool to move the design to the desired place
Step 25: use the focus tool to put where your design starts and stops on the water bottle
Step 26: if all of that is good the close the top of the laser and turn on the fans
Step 27: Click on the green play button
Step 28: Once the process is finished take out your water bottle
Step 29: You now have a new water bottle
3D cardboard
Step 1: Go onto thingverse and find a 3d design
Step 2: Save file
Step 3: Go to adobe illustrator
Step 4: open up the 3D file
Step 5: Change the file design to red and .0001
Step 6: Save file on USB
Step 7: Go to innovation center
Step 8: Grab piece of cardboard
Step 9: Measure cardboard dimensions
Step 10: Put USB in laptop
Step 11: Click on correct file
Step 12: Click on file then print
Step 13: Click setup then preferences
Step 14: change the material to Foam then
Foam core
Step 15: Enter the thickness of the cardboard
Step 16: change the print direction to the bottom up.
Step 17: Click apply then OK
Step 18: Click print then print again
Step 19: Move the design to the desired spot with the relocation tool
Step 20: Use the focus tool for the 4 corners
Step 21: if it looks good then press the green play button.
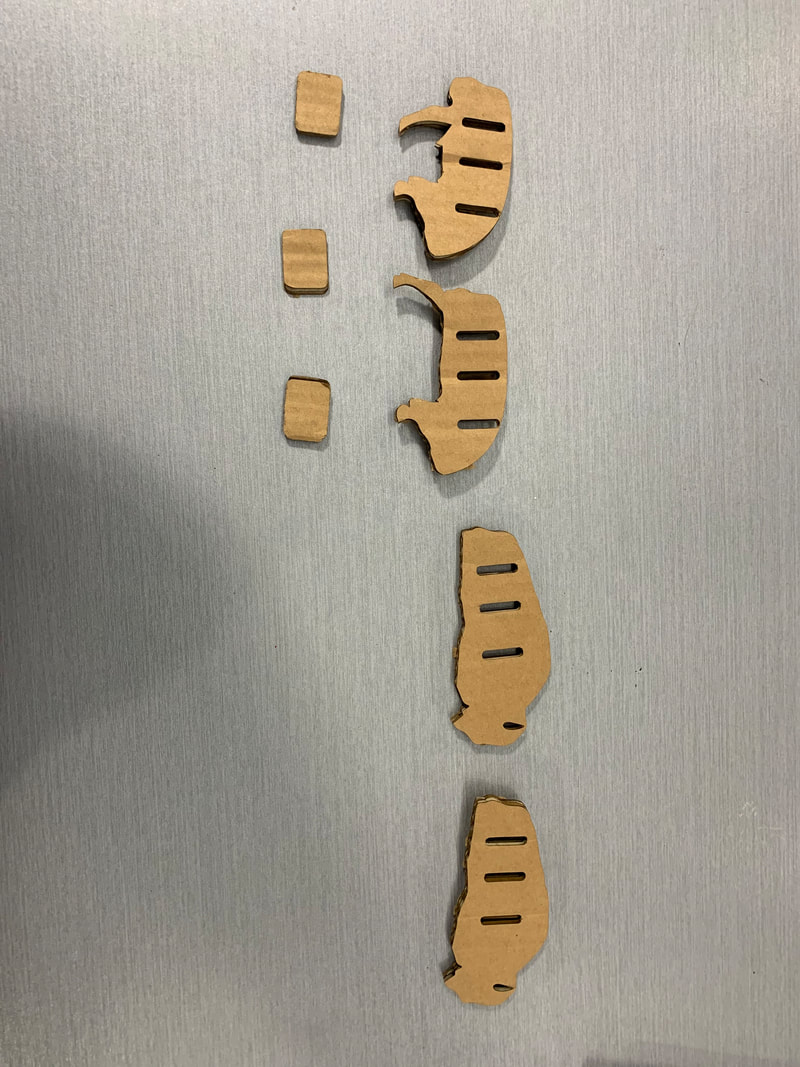
Step 22: Once the cardboard is finished printing lay out all the pieces on a table
Step 23: Then start to put together the pieces as shown
Step 1: Go onto thingverse and find a 3d design
Step 2: Save file
Step 3: Go to adobe illustrator
Step 4: open up the 3D file
Step 5: Change the file design to red and .0001
Step 6: Save file on USB
Step 7: Go to innovation center
Step 8: Grab piece of cardboard
Step 9: Measure cardboard dimensions
Step 10: Put USB in laptop
Step 11: Click on correct file
Step 12: Click on file then print
Step 13: Click setup then preferences
Step 14: change the material to Foam then
Foam core
Step 15: Enter the thickness of the cardboard
Step 16: change the print direction to the bottom up.
Step 17: Click apply then OK
Step 18: Click print then print again
Step 19: Move the design to the desired spot with the relocation tool
Step 20: Use the focus tool for the 4 corners
Step 21: if it looks good then press the green play button.
Step 22: Once the cardboard is finished printing lay out all the pieces on a table
Step 23: Then start to put together the pieces as shown
What I have Learned
What I learned during this rotation was how to be creative with my mind and how to put an idea into a physical object. This will be very helpful when I want to create something on my own that is original. I think that when I am older and I have to solve a problem I will be able to put my idea into reality without having someone else do it.
